Showing posts with label Sculpture. Show all posts

Sunday, January 18, 2015

Animal Faces (2014)

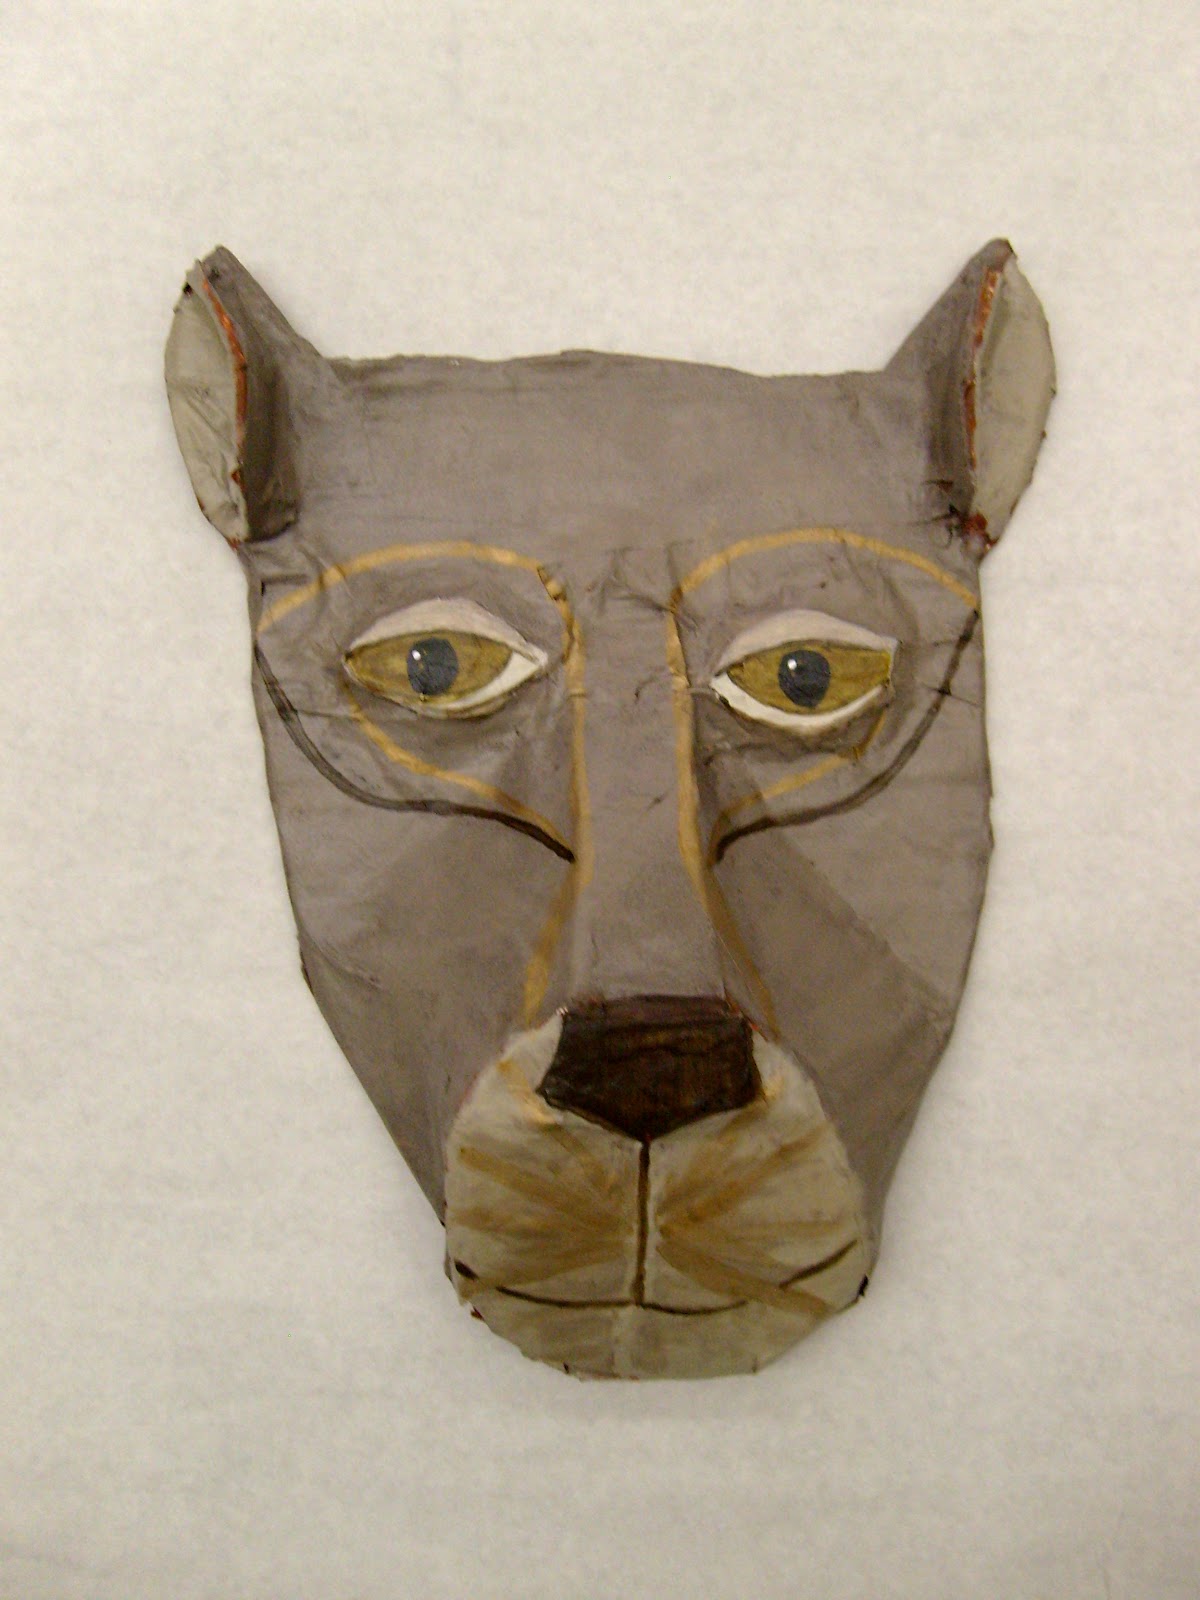
My 7th graders were given the challenge of turning a human face mold into an animal face. Each student began by plastering a human face mask. Based upon the shape of the animal's head the students used newspaper and cardboard to create the relief shapes of the animal on top of the plastered human face. Students used masking tape or hot glue to attach the animal pieces. They then used plaster gauze strips to coat the newspaper and cardboard attaching it to the human face.

I was given almost 100 boxes from the Tech department when they received new computer parts and used them to mount the animal faces to. Students plastered the box and then plastered the animal face to the box creating the look of a taxidermy mount. Students used acrylic paint to finish their project. They had the choice of making their animal look realistic or more cartoon. They were required to paint the sides of the box and then we drilled a hole in the back of the box so it could hand on the wall.

The kids really enjoyed this project and the messiness of the plaster. The variety of all the animal choices made for a fun display in the hallway.


Please email me at splattersandsmudges@gmail.com if you have questions about this lesson.

Wednesday, October 23, 2013

Monsters

My 7th Graders created original Monster sculptures from plaster. They used newspaper and cardboard for the inside base and then used plaster strips to coat the surface. Students then used acrylic paint or other texture items to finish the body of the Monster. This project took nine- 55 minute classes to complete. I was inspired by this pinterest project.

Inside structure
 
Plaster


Buggin Out

My 7th Graders created Bug sculptures inspired by an actual insect (or spider). Students found an image of an insect of the Internet to work from. They then used wire to build the armature for their sculpture. Nylon (pantyhose) was stretched over the surface and connected on the bottom side with hot glue or by sewing the pieces together. Students then painted a layer of gesso on the nylon to make it stiff and then painted acrylic paint following the design of their original insect. I created this project in a workshop for Art Teachers 2 years ago. This project took eight 55 minute classes.


Abstract Sculptures

My 7th Graders learned about Aboriginal Art and how the Aboriginees used dots to create their paintings. Students were given a wood block, 2 feet of wire, and nylon to create their abstract sculptures. I pre drilled 2 holes in each wood block for the wire to be placed into. Students twisted the wire to their desired form and then used hot glue to hold the wire in place.

 
Students then stretched a piece of nylon (it was a knee high pantyhose) over the wire and hot glued the opening on the bottom of the wood block. They then painted a layer of gesso to prime the surface and make the nylon more stiff.


Students then painted the surface in the style of Aboriginal Art focusing on patterns, movements, and variety in the size of dots. I provided them 6 different sized wooden dowels to dot with. I originally saw this project idea on pinterest.


Sunday, April 22, 2012

Recycled Art (2010)

My advanced art class studied the artwork of Tara Donovan and how she uses found objects to create massive sculptures. Students were challenged to create their own sculptures from found objects inspired by Donovan's work. Students were required to supply their own materials and were challenged to discover new ways to manipulate their material beyond the obvious solution.

                                                                Sugar Cubes

                                                                       Pennies

                                                                         Tampons

                                                              Hot Glue and Tin Foil

                                                                        GI Joes


**As with any art project I post please email me if you have questions about materials used, processes, or if you would like lesson plans. splattersandsmudges@gmail.com You can also ask questions in the comment section below each post.**


Lion King Masks (2009)

In 2009 the Disney musical, The Lion King, came to San Diego and the dance teacher at my school asked me if I wanted to take my art students with her class to watch the Broadway show. Of course I did! So I quickly came up with a lesson plan to justify our field trip. Disney actually has a great education website with teacher lesson plans and a DVD behind the scenes to help prepare your students before they watch he musical. The DVD is so fascinating and shows all aspects of the production from costumes and masks, stage design, lighting, choreography, etc. My students really enjoyed watching the clips and they completed a study guide about what they learned. This was also great for the kids that couldn't come watch the musical in person because they still felt included. The musical was fantastic!!! The costumes were amazing and of course the music is wonderful. My students LOVED it and was definitely the highlight of the year.

After watching the musical my students constructed their own masks inspired by The Lion King. I let the kids choose to work in a group or by themselves. They also had the option of recreating a character from The Lion King or making another African animal. Students drew rough draft sketches to plan their design and then built the mask out of cardboard. They paper mached the cardboard, painted a layer of gesso, and then used acrylic paint to finish the mask. The project turned out great and this is hands down one of my favorite lesson plans!


                                                                   Teacher Example
**As with any art project I post please email me if you have questions about materials used, processes, or if you would like lesson plans. splattersandsmudges@gmail.com You can also ask questions in the comment section below each post.**

Paper Mache Bowls (2010)

My Junior High art students learned about sculpture by making paper mache bowls. (I saw this project idea on Artsonia). Each student used a Styrofoam bowl as a mold and I placed a piece of tin foil inside the bowl. Students then paper mached the inside of the bowl mold by using thin strips of newspaper dipped in Elmer's glue. They paper mached 3 layers making sure the bowl was thick enough to hold it's form. Students then cut pieces of tissue paper and applied it in color sections to create the design on their bowl. Students painted a thin layer of Elmer's glue on the paper mach and applied the tissue paper. Most students did 2-3 layers of tissue paper until the newspaper underneath couldn't be seen. Lastly, students painted a layer of mod podge on both sides of their bowl to seal it and make it have a glossy surface.


**As with any art project I post please email me if you have questions about materials used, processes, or if you would like lesson plans. splattersandsmudges@gmail.com You can also ask questions in the comment section below each post.**