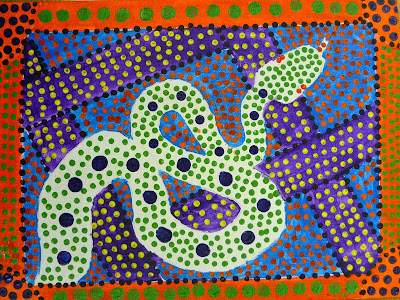
My 8th grade students learned about the style of Aboriginal Art and how the tribal artists used patterned dots to create their artwork. Students chose an animal to be the subject of their artwork and found an image from the Internet to work from. Student first drew a rough draft in markers to practice the design of their patterned dots. Students then worked on a 9x12 canvas board and drew the contour lines of their animal. Students painted the background colors first that would be seen in between the dots. I provided 6 different sized wooden dowels that the students used to dot their painting. Student were not allowed to use the biggest size dot but had to show a variety in the dot size. This project took about nine 55 minute class periods.
Wednesday, October 23, 2013
Altered Landmarks (2013)
Students chose a famous landmark to be the subject of their painting. They found a digital image of the landmark on the Internet and then used the Cut Out filter in Photoshop. They also chose one main color to work with a monochromatic color scheme and altered the color in Photoshop. Students had the choice of painting a ceiling tile to be permanently installed in the school's hallway or painting on Watercolor paper and keeping their painting. I allowed students to use a projector to trace their image onto the canvas since the focus of the project was to work on painting and color mixing techniques. This project took eight 55 minute classes to complete.
 |
| Eiffel Tower |
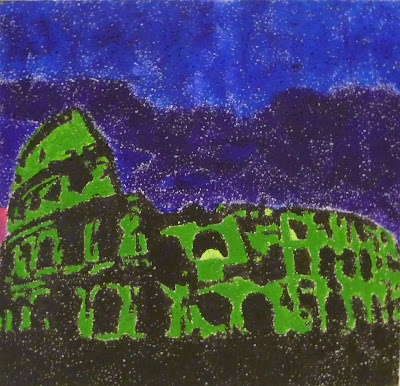 |
| The Colosseum |
 |
| The Eiffel Tower |
 |
| Taj Mahal |
 |
| Sydney Opra House |
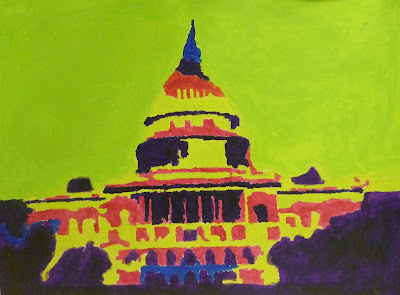 |
| Capitol Hill |
 |
| Route 66 |
 |
| Eiffel Tower |
 |
| Hotel Del |
 |
| Big Ben |
Chuck Close Ups (2012)
My 8th Grade students had 2 weeks left of the quarter and made these Chuck Close inspired paintings of a close up of their eye. I took photos of their face and cropped just their eye. Students drew a half inch grid on the black and white photo that was 3x5. Students then drew a one inch grid on 6x10 in watercolor paper and enlarged their eye by drawing the contour lines. Students learned about monochromatic color shcemes and chose one color to paint their project with while mixing numerous tints and shades of that color to represent the highlights and shadows. This project took five-55 minute classes.
Chuck Close Portraits (2013)
My 8th Grade students learned about the artwork of Chuck Close and how he used a grid to enlarge a photo. Students were given the choice to bring in a photo of themselves or I took a photo of them in class. Students put a one inch grid on the photo and then chose to work with colored pencil or watercolor pencil. Students put a one inch grid on their project paper and used the grid to draw the contour lines of their facial features. They chose one color scheme for the background, a second color scheme for their skin, and third and fourth color schemes for their hair and clothes. This project took about eight 55 minute class periods.
Tuesday, March 19, 2013
Pixar Animation Lesson Plan
I use this lesson plan when I have a random class period where there isn't quite enough time to start a new project or when I'm sick and have lost my voice and can't teach but don't want to take a sick day.
I saw a documentary on TV about the history of PIXAR computer animation and was so fascinated. The pace and wordage is appropriate for middle school or high school students. I wouldn't show it to elementary students as it wouldn't hold their attention. PIXAR sells a DVD of just their Short Films (which are my favorite) and the documentary is a special feature of the DVD. I was able to purchase the DVD at my local Best Buy.

For this lesson plan I begin class by having students brainstorm all the careers you could have as an artist. For the sake of competition I offer a prize to the group that can think of the most jobs. I then transition into introducing the career of being a computer animator for PIXAR. I explain to the kids that movies like Toy Story and Finding Nemo were possible because of the computer scientists and animators that developed the software that made computer animated movies possible. I explain that the documentary they are going to watch details the history of PIXAR computer animation. I show the documentary which is 23 minutes and provide the students with a worksheet I've created with fill in the blank questions that they must complete while watching the movie and turn in for a grade. This helps keep their attention and makes them responsible for the material.
For the remaining 25 minutes of class I have a whole variety of "How To Draw" worksheets that show step-by-step illustrations of how to draw the PIXAR characters that come from this book.

I let the students choose which character they want to draw and depending on the class I will give them a required number of characters they must turn in by the end of the period. I have found that students really love to do these drawing activities. At the middle school age, How to Draw books are like crack...they fight over the books and will draw anything.
If I have two class periods to fill I will play the entire PIXAR Shorts and let the kids draw while they watch the movie. We then discuss how the look of computer animation has changed over the past 30 years and compare and contrast the first animated Shorts to the most recent Shorts. This lesson plan has been very successful and the students like that it's artwork they can relate to while gaining more understanding about the process of creating animated films.
I've got 2 class periods to fill before Spring Break and I've lost my voice and can't talk. This lesson is a life savor for sure. It requires minimal talking on my part and the kids are still learning about careers in art and participating in engaging artwork.
If you would like a copy of the worksheet students complete while watching the documentary please email me.
I saw a documentary on TV about the history of PIXAR computer animation and was so fascinated. The pace and wordage is appropriate for middle school or high school students. I wouldn't show it to elementary students as it wouldn't hold their attention. PIXAR sells a DVD of just their Short Films (which are my favorite) and the documentary is a special feature of the DVD. I was able to purchase the DVD at my local Best Buy.

For this lesson plan I begin class by having students brainstorm all the careers you could have as an artist. For the sake of competition I offer a prize to the group that can think of the most jobs. I then transition into introducing the career of being a computer animator for PIXAR. I explain to the kids that movies like Toy Story and Finding Nemo were possible because of the computer scientists and animators that developed the software that made computer animated movies possible. I explain that the documentary they are going to watch details the history of PIXAR computer animation. I show the documentary which is 23 minutes and provide the students with a worksheet I've created with fill in the blank questions that they must complete while watching the movie and turn in for a grade. This helps keep their attention and makes them responsible for the material.
For the remaining 25 minutes of class I have a whole variety of "How To Draw" worksheets that show step-by-step illustrations of how to draw the PIXAR characters that come from this book.

I let the students choose which character they want to draw and depending on the class I will give them a required number of characters they must turn in by the end of the period. I have found that students really love to do these drawing activities. At the middle school age, How to Draw books are like crack...they fight over the books and will draw anything.
If I have two class periods to fill I will play the entire PIXAR Shorts and let the kids draw while they watch the movie. We then discuss how the look of computer animation has changed over the past 30 years and compare and contrast the first animated Shorts to the most recent Shorts. This lesson plan has been very successful and the students like that it's artwork they can relate to while gaining more understanding about the process of creating animated films.
I've got 2 class periods to fill before Spring Break and I've lost my voice and can't talk. This lesson is a life savor for sure. It requires minimal talking on my part and the kids are still learning about careers in art and participating in engaging artwork.
If you would like a copy of the worksheet students complete while watching the documentary please email me.
Thursday, March 14, 2013
2013: Silhouettes in the Sky
6th grade students created a mixed media art project that focused on a famous landmark. Students learned about warm, cool, complementary, and monochromatic color schemes and chose one to be the background for their project. They used the bleeding tissue paper technique to paint the sky on 12x 18 in watercolor paper.
Next, students chose a famous landmark (I provided photos of 30 different landmarks) and they drew the contour edge of the landmark on white 12 x18 drawing paper. They divided the paper into thirds and learned how to create asymmetrical symmetry by using the Rule of Thirds. Their goal was to draw the silhouette of the landmark large and located where a set of grid lines crossed. This step was a rough draft and I encouraged students not to Erase lines if they made a mistake.
Next, students chose a famous landmark (I provided photos of 30 different landmarks) and they drew the contour edge of the landmark on white 12 x18 drawing paper. They divided the paper into thirds and learned how to create asymmetrical symmetry by using the Rule of Thirds. Their goal was to draw the silhouette of the landmark large and located where a set of grid lines crossed. This step was a rough draft and I encouraged students not to Erase lines if they made a mistake.
Next students used an exacto knife to cut out the silhouette. This became a stencil to trace on black construction paper. Students then cut out the black construction paper with an exacto knife. (Students are required to take a safety quiz before they're allowed to use the exacto knives).
Finally, students used rubber cement to glue down the the black silhouette on their painted sky.
2013: Pop Art Drawings
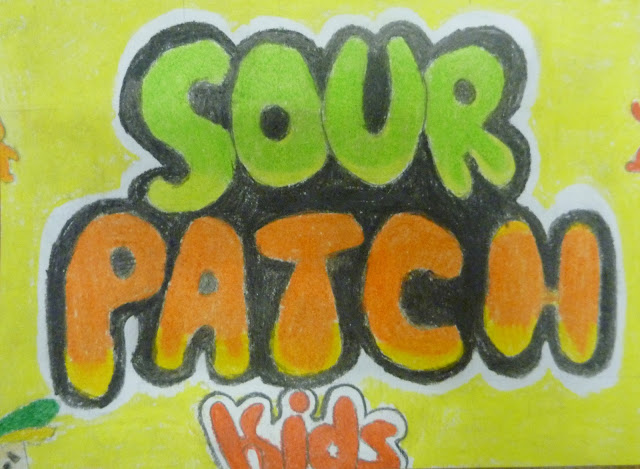
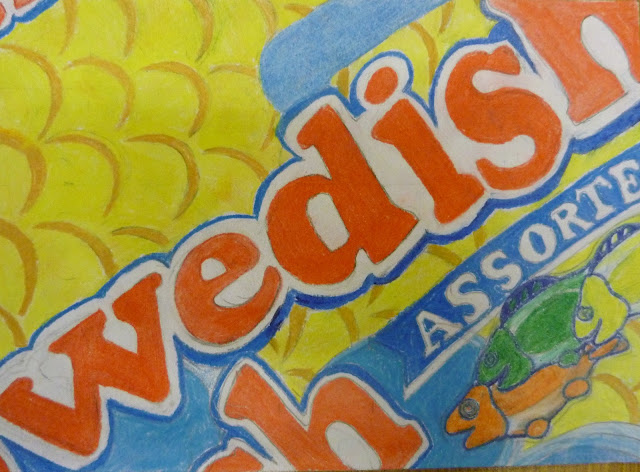
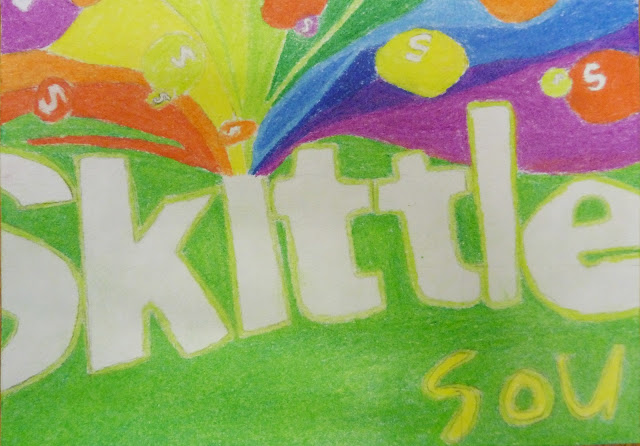
To end the 3rd quarter my 8th grade students created Pop Art drawings of candy boxes. We only had 3 weeks (7 class periods) to make these so I kept them on a manageable scale of 5x7 in. I collect candy boxes year round for this project so I had about 30 boxes to let my students draw from. I gave them a choice to bring in their own candy box and I did let them eat candy while they drew (I figured the sugar would kick in after they'd left my class).
My librarian is fantastic about saving the extra lamination plastic and brings them to my class all year. I cut these into 3.5 x 2.5 in rectangles. Each student began by using sharpie and measuring every half inch around all 4 sides. Then they used the ruler to connect opposite marks and ended up with half inch boxes 7 across and 5 down. I passes out scrap paper so they could see the plastic easier and the sharpie wouldn't end up on my desks.
Next, students enlarged the grid to one inch on their 5 x 7 in drawing paper. I instructed them to draw as light as possible and provided 6H drawing pencils so they couldn't draw dark. They measured every inch around all 4 sides of the paper and used the ruler to connect opposite marks ending up with one inch boxes 7 across and 5 down.
Students taped their clear plastic grid over a section of the candy box they wanted to draw. They were required to include part of the lettering. They began by lightly drawing the contour lines of the fonts and logos. When they finished I checked their drawings and then they erased the grid lines.
Finally they colored in the drawing with colored pencils trying to accurately match the same colors and design. This project was a good way to end the quarter and 7 class periods was just enough time to finish. I was inspired by this idea from pinterest.
Subscribe to:
Posts (Atom)


