Sunday, April 22, 2012

Watercolor Landscapes (2010)

My advanced art class learned about atmospheric perspective and the use of foreground, middle ground, and background in landscapes. Students created rough draft sketches in their sketchbooks before they painted their 18x 24 in. watercolor landscapes. They also practiced various watercolor techniques like making washes, wet on wet, wet on dry, and using salt as texture.


                                                                    Teacher Example

**As with any art project I post please email me if you have questions about materials used, processes, or if you would like lesson plans. splattersandsmudges@gmail.com You can also ask questions in the comment section below each post.**

Carlsbad Art Splash (2009)

In the Fall on 2009 I was invited to bring my advanced art class to participate in the Carlsbad Art Splash  for the second year in a row. (Click here to see 2008 mural).  This weekend art festival features professional artists creating artwork live for the public. Sidewalk murals are the highlight of the Carlsbad Art Splash and my art class was privileged to create one along with all the professional artists.

The week prior to Art Splash my advanced art class planned their design and practiced drawing it on the sidewalk at our school. I had students sign up for 3 hour shifts the weekend of the festival and they all worked together to complete the 8x8 ft. mural. The students did an amazing job on the mural and it was definitely a favorite of the young kids at the festival.


**As with any art project I post please email me if you have questions about materials used, processes, or if you would like lesson plans. splattersandsmudges@gmail.com You can also ask questions in the comment section below each post.**

Lion King Masks (2009)

In 2009 the Disney musical, The Lion King, came to San Diego and the dance teacher at my school asked me if I wanted to take my art students with her class to watch the Broadway show. Of course I did! So I quickly came up with a lesson plan to justify our field trip. Disney actually has a great education website with teacher lesson plans and a DVD behind the scenes to help prepare your students before they watch he musical. The DVD is so fascinating and shows all aspects of the production from costumes and masks, stage design, lighting, choreography, etc. My students really enjoyed watching the clips and they completed a study guide about what they learned. This was also great for the kids that couldn't come watch the musical in person because they still felt included. The musical was fantastic!!! The costumes were amazing and of course the music is wonderful. My students LOVED it and was definitely the highlight of the year.

After watching the musical my students constructed their own masks inspired by The Lion King. I let the kids choose to work in a group or by themselves. They also had the option of recreating a character from 
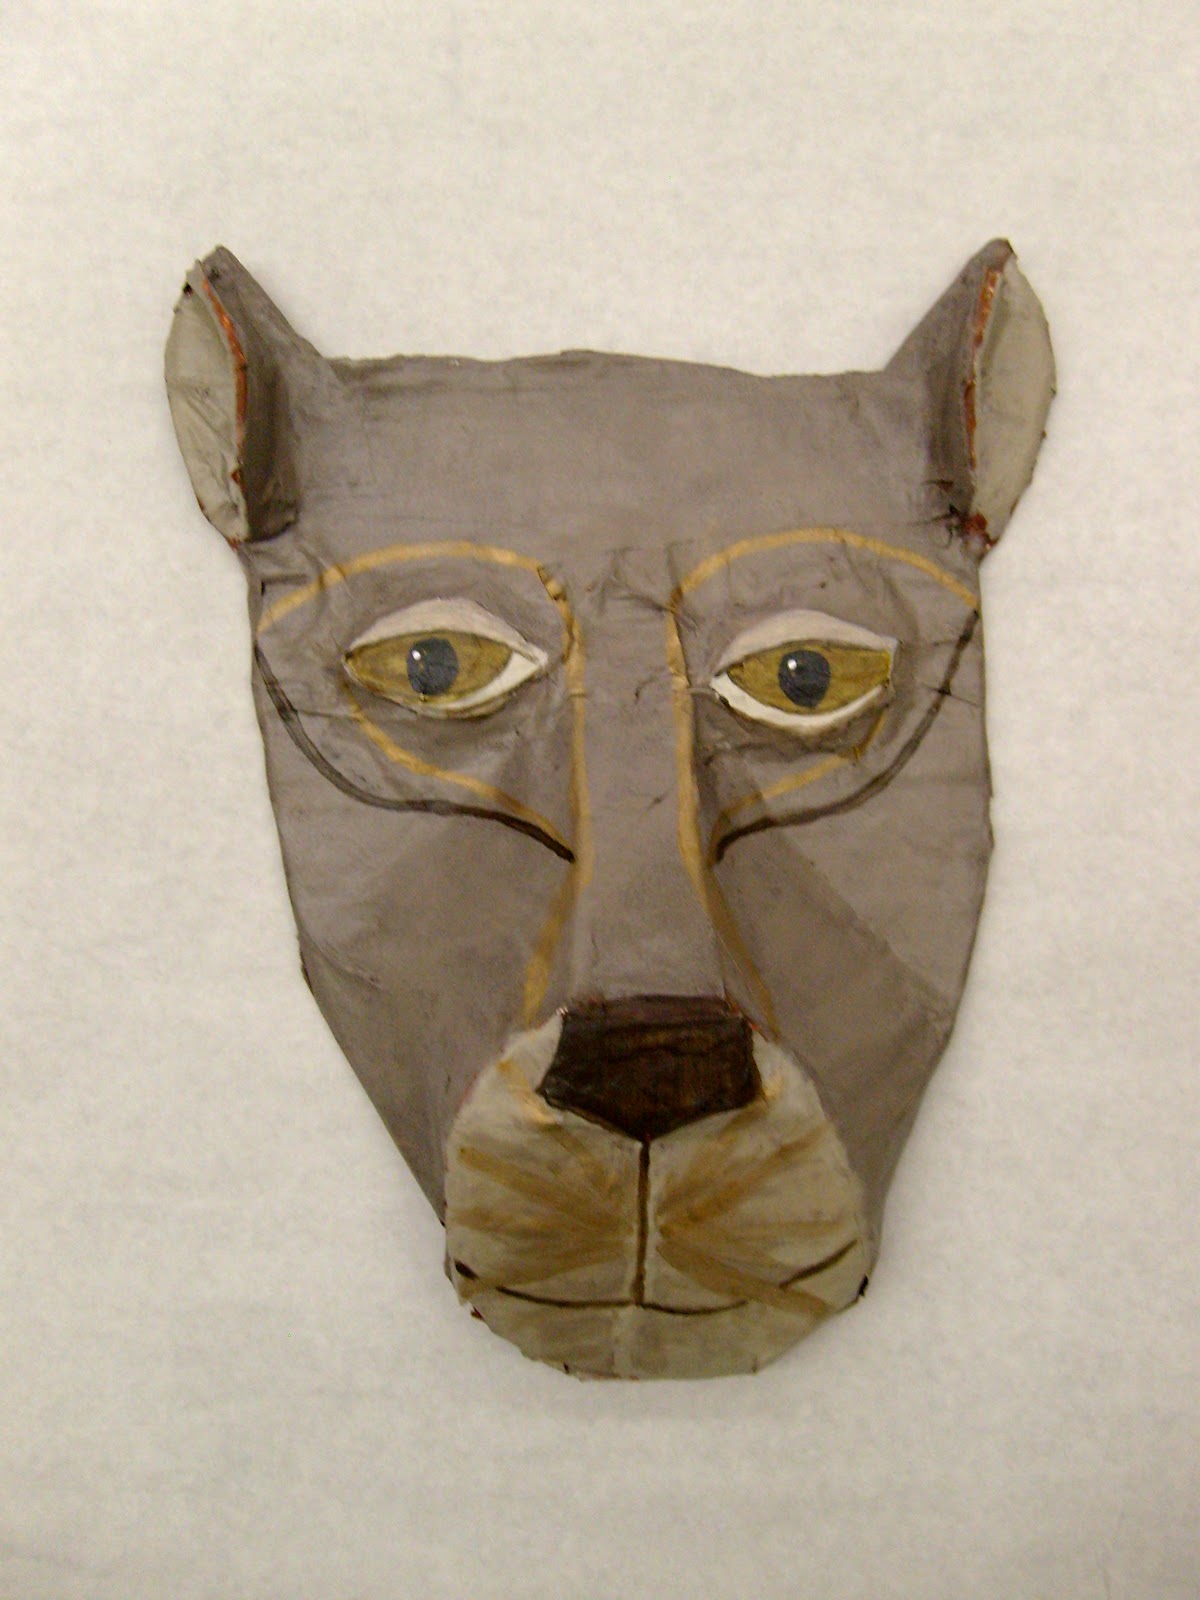
The Lion King or making another African animal. Students drew rough draft sketches to plan their design and then built the mask out of cardboard. They paper mached the cardboard, painted a layer of gesso, and then used acrylic paint to finish the mask. The project turned out great and this is hands down one of my favorite lesson plans!


                                                                   Teacher Example
**As with any art project I post please email me if you have questions about materials used, processes, or if you would like lesson plans. splattersandsmudges@gmail.com You can also ask questions in the comment section below each post.**

Paper Mache Bowls (2010)

My Junior High art students learned about sculpture by making paper mache bowls. (I saw this project idea on Artsonia). Each student used a Styrofoam bowl as a mold and I placed a piece of tin foil inside the bowl. Students then paper mached the inside of the bowl mold by using thin strips of newspaper dipped in Elmer's glue. They paper mached 3 layers making sure the bowl was thick enough to hold it's form. Students then cut pieces of tissue paper and applied it in color sections to create the design on their bowl. Students painted a thin layer of Elmer's glue on the paper mach and applied the tissue paper. Most students did 2-3 layers of tissue paper until the newspaper underneath couldn't be seen. Lastly, students painted a layer of mod podge on both sides of their bowl to seal it and make it have a glossy surface.


**As with any art project I post please email me if you have questions about materials used, processes, or if you would like lesson plans. splattersandsmudges@gmail.com You can also ask questions in the comment section below each post.**

Candy Box Perspective (2009)

My Junior High art students learned about one and two point perspective. They chose a candy box to be their subject and drew it in 2 point perspective. (I saw this project on Artsonia). Students were challenged to replicate the logo, colors, and font from the original box while capturing table shadows to show a sense of realism. On the day of our project critique we had a huge candy eating party!


**As with any art project I post please email me if you have questions about materials used, processes, or if you would like lesson plans. splattersandsmudges@gmail.com You can also ask questions in the comment section below each post.**

Saturday, April 21, 2012

Aboriginal Art (2009)

My Junior High art students learned about the artworks made from the Aboriginal culture in Australia. Students chose an animal to be the subject of their painting. They used a wooden dowel to dot their designs with acrylic paint. Students tried to capture the textures and styles of abstraction from Aboriginees.


Teacher Example

**As with any art project I post please email me if you have questions about materials used, processes, or if you would like lesson plans. splattersandsmudges@gmail.com You can also ask questions in the comment section below each post.**

Friday, April 20, 2012

Op Art Cube (2012)

My 6th Grade students learned about Op Art by studying the artwork of Bridget Riley. They had to design 6 different optical illusions to cover the sides of a paper cube. I was inspired by this pinterest idea here. I made a template for the students to trace on 12x18 in drawing paper. Each side of the cube was 4x4 in. Students drew 6 small rough drafts in their sketchbook, traced the template on big paper, and then drew their designs in each square. Projects were colored with markers and then folded and glued together. I used fishing line to hang the projects in our school stairwell.


**As with any art project I post please email me if you have questions about materials used, processes, or if you would like lesson plans. splattersandsmudges@gmail.com You can also ask questions in the comment section below each post.**