Tuesday, March 19, 2013

Pixar Animation Lesson Plan

I use this lesson plan when I have a random class period where there isn't quite enough time to start a new project or when I'm sick and have lost my voice and can't teach but don't want to take a sick day.

I saw a documentary on TV about the history of PIXAR computer animation and was so fascinated. The pace and wordage is appropriate for middle school or high school students. I wouldn't show it to elementary students as it wouldn't hold their attention. PIXAR sells a DVD of just their Short Films (which are my favorite) and the documentary is a special feature of the DVD. I was able to purchase the DVD at my local Best Buy.


For this lesson plan I begin class by having students brainstorm all the careers you could have as an artist. For the sake of competition I offer a prize to the group that can think of the most jobs. I then transition into introducing the career of being a computer animator for PIXAR. I explain to the kids that movies like Toy Story and Finding Nemo  were possible because of the computer scientists and animators that developed the software that made computer animated movies possible. I explain that the documentary they are going to watch details the history of PIXAR computer animation.  I show the documentary which is 23 minutes and provide the students with a worksheet I've created with fill in the blank questions that they must complete while watching the movie and turn in for a grade. This helps keep their attention and makes them responsible for the material.

For the remaining 25 minutes of class I have a whole variety of "How To Draw" worksheets that show step-by-step illustrations of how to draw the PIXAR characters that come from this book.


I let the students choose which character they want to draw and depending on the class I will give them a required number of characters they must turn in by the end of the period. I have found that students really love to do these drawing activities. At the middle school age, How to Draw books are like crack...they fight over the books and will draw anything.

If I have two class periods to fill I will play the entire PIXAR Shorts and let the kids draw while they watch the movie. We then discuss how the look of computer animation has changed over the past 30 years and compare and contrast the first animated Shorts to the most recent Shorts. This lesson plan has been very successful and the students like that it's artwork they can relate to while gaining more understanding about the process of creating animated films.

I've got 2 class periods to fill before Spring Break and I've lost my voice and can't talk. This lesson is a life savor for sure. It requires minimal talking on my part and the kids are still learning about careers in art and participating in engaging artwork.

If you would like a copy of the worksheet students complete while watching the documentary please email me.

Thursday, March 14, 2013

2013: Silhouettes in the Sky

6th grade students created a mixed media art project that focused on a famous landmark. Students learned about warm, cool, complementary, and monochromatic color schemes and chose one to be the background for their project. They used the bleeding tissue paper technique to paint the sky on 12x 18 in watercolor paper.

Next, students chose a famous landmark (I provided photos of 30 different landmarks) and they drew the contour edge of the landmark on white 12 x18 drawing paper. They divided the paper into thirds and learned how to create asymmetrical symmetry by using the Rule of Thirds. Their goal was to draw the silhouette of the landmark large and located where a set of grid lines crossed. This step was a rough draft and I encouraged students not to Erase lines if they made a mistake.


Next students used an exacto knife to cut out the silhouette. This became a stencil to trace on black construction paper.  Students then cut out the black construction paper with an exacto knife. (Students are required to take a safety quiz before they're allowed to use the exacto knives).


Finally, students used rubber cement to glue down the the black silhouette on their painted sky.


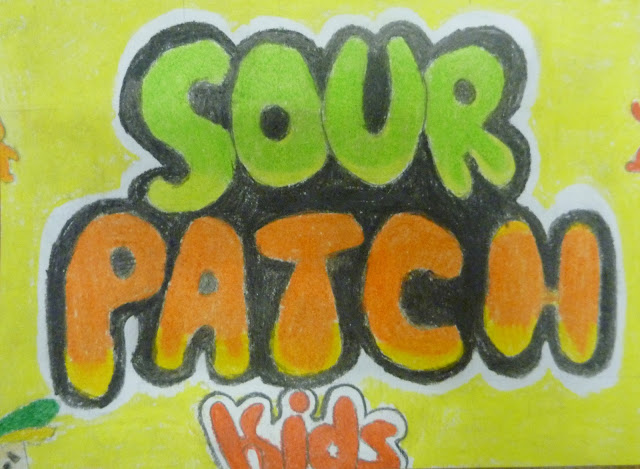
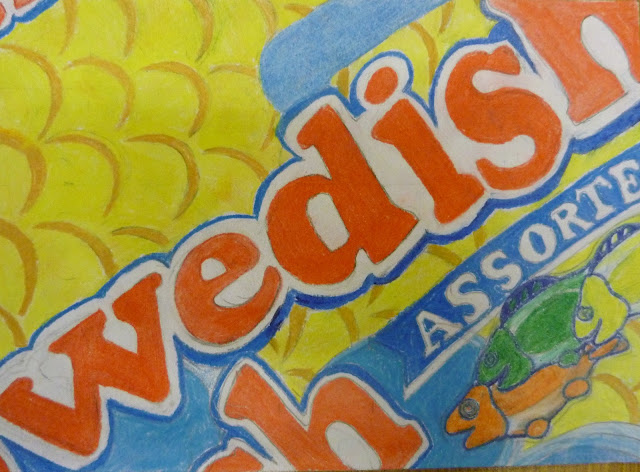
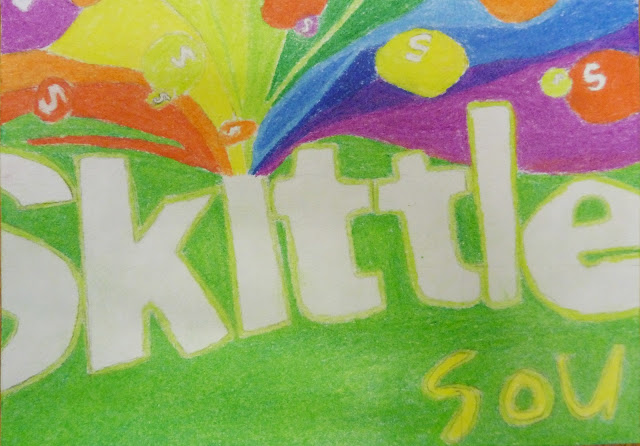
2013: Pop Art Drawings

To end the 3rd quarter my 8th grade students created Pop Art drawings of candy boxes. We only had 3 weeks (7 class periods) to make these so I kept them on a manageable scale of 5x7 in.  I collect candy boxes year round for this project so I had about 30 boxes to let my students draw from. I gave them a choice to bring in their own candy box and I did let them eat candy while they drew (I figured the sugar would kick in after they'd left my class).

My librarian is fantastic about saving the extra lamination plastic and brings them to my class all year. I cut these into 3.5 x 2.5 in rectangles. Each student began by using sharpie and measuring every half inch around all 4 sides. Then they used the ruler to connect opposite marks and ended up with half inch boxes 7 across and 5 down. I passes out scrap paper so they could see the plastic easier and the sharpie wouldn't end up on my desks.

Next, students enlarged the grid to one inch on their 5 x 7 in drawing paper. I instructed them to draw as light as possible and provided 6H drawing pencils so they couldn't draw dark. They measured every inch around all 4 sides of the paper and used the ruler to connect opposite marks ending up with one inch boxes 7 across and 5 down.


Students taped their clear plastic grid over a section of the candy box they wanted to draw. They were required to include part of the lettering. They began by lightly drawing the contour lines of the fonts and logos. When they finished I checked their drawings and then they erased the grid lines.


Finally they colored in the drawing with colored pencils trying to accurately match the same colors and design. This project was a good way to end the quarter and 7 class periods was just enough time to finish. I was inspired by this idea from pinterest.


Friday, March 8, 2013

2012 Mixed Media Snowflakes

Part of our 6th Grade curriculum is that we teach a mixed media project. I had this group second quarter before Christmas break and wanted to focus on snowflakes. I found a great video clip of Wilson Bentley on youtube and introduced his photography to the class. I then compared  his original photographs to that of the scientist Kenneth Libbrecht and showed them a video clip on youtube about his high tech images of snowflakes. Students looked at printed images of both photographers and studied the structure of a snowflake. This was the foundation of our art project.

First students drew a symmetrical snowflake with 6 stems. I provided a hexagon for them to trace as the central point. They used rulers to draw the axis lines that went through the corners of the hexagon. The requirements were that they had to draw at least 6 different shapes along the stem of the snowflake. I then gave the students tracing paper and they traced the one stem and copied it onto the remaining 5 stems so that their snowflake was completely symmetrical.


After the students drew these snowflakes they were given 12x 18 watercolor paper and we used light tables to trace their snowflake drawing onto the watercolor paper. The kids then outlined their snowflake with sharpie. Next the students water colored their background around the sharpie snowflake. I taught the kids 8 different watercolor techniques and they were required to use cool colors so the projects looked more like winter. I had them outline their snowflakes with white crayon to resist the paint and they spent one class period watercoloring.

Next I taught the kids about the art of Kirigami and provided numerous kirigami snowflake patterns for them to draw from. The kids were required to make one kirigami snowflake from white paper and one from magazine. After these were cut out they used mod podge to glue their snowflakes on the watercolor paper. I had them paint a layer of mod podge over the entire project to give it a shiny surface. The kids really liked this project and the final results were wonderful. This is a great winter project!


Thursday, March 7, 2013

Early Finisher: Art Collage

I began teaching at a new school this year and realized that my classroom door needed to be labeled as the Art Room.  As kids finished their art projects I had the early finishers help collage the word ART for me. I wanted it to transition through the color wheel so I had the kids tear pages out of magazines based upon the colors of the rainbow. On watercolor paper I drew the letters A-R-T and had students that finished early cut the colored magazine pages into pieces to fill in the letters. They used rubber cement to glue the magazines and I laminated the letters so they would be more durable. I love how the collages turned out and now my room is clearly labeled as ART. Can anyone tell me how to rotate a picture when it gets uploaded?

2013 Group Mural: Walking the Line

I saw this idea on pinterest and had my 6th graders create a Walking Line Mural. We had a couple of days were class was 30 minutes due to state testing and that just isn't enough time to work on big projects. To organize the mural I had the students make a single file line with a pencil in their hand. I gave each student a piece a white watercolor paper. The first student was directed draw a squiggly line that went all the way across their paper. The second student had to connect their line to the end of the first one. The students were directed to write their name and their number on the back of their paper so I could display them in order. Each student connected their line to the previous line until every kid had drawn a portion of the mural.

The students were directed to paint their line with 3 different watercolors making it bright and bold. In the white space around the colored line they were instructed to use pencil and divide their space into 10 sections. Each section then had a unique line design drawn in so all 10 spaces looked different. Lastly the students outlined their pencil in sharpie.  This was a simple 2 day project and the kids were excited to see their mural on display and I liked that my white walls looked more creative.


2013 Group Mural: Silhouettes

These silhouettes were created by students that finished their art projects early. This took an entire quarter to complete and all 3 grade levels worked on it. To begin with I had my smallest class (9 students) trace their bodies on butcher paper. I had them choose their pose based upon an activity a middle school student would participate in. These kids were very musical so most of the figures were playing instruments.

As students finished projects early I assigned them to tear pages out of magazines looking for specific colors. I had a couple of days were I had an entire class do this step while they waited for their clay to fire. Some students tore out pages, some students used circle stencils and traced various sizes of circles with sharpies onto the colored pages. A third group of students cut out these circles. We kept the circles organized in envelopes by color groups. When I had plenty of circles cut out I had students begin to glue down the circles with rubber cement. I let the students pick their color schemes and love the final result.

These silhouettes filled my display cases 1st quarter. I got a lot of complements by the staff and the kids liked seeing the final product (especially the ones that got stuck cutting out all the circles as that was super tedious). They have since made their way onto the doors of my clay room.

I wish I could get these pictures to rotate...frustrating!


2013 Group Mural: Op Art


I decided this quarter that my early finishers would work on a group mural that I could hang in my clay room.  I saw this idea on pinterest and adjusted it a bit. This mural required little organization on my part. I took 4 pieces of watercolor paper that were 36 in x 24 in and set them in a block of 4. I sketched the outline of an optical illusion in pencil. Then as students finished their art projects they were instructed to begin coloring in the sections to the mural with oil pastel. I gave them no rules and let them color any way they wanted. I love the final result and how bright and colorful it made my wall.